Saturday, July 20, 2013

A celebration with Buela...a.k.a. Flank Steak Tacos

Sometimes what I need is time to remember something good that happened when I was a young girl.  Most of these memories, for me, are centered around the time we lived with Buela Gonzalez.  I wish I had a picture of her. Right now what I have is a shadowed memory of what she looks like and a vivid memory of her tacos.

So that is where we will begin...with the tacos.  She used flank steak and so do I!
There are a few things you will need to do in order to get these one the grill.

1. See those cuts in the meat?  Cut diagonally across the meat and then flip it around and do the same thing.  Make sure you do not cut all the way through. This is to prevent the meat from curling up.

2. You can season these how you wish but Buela always used salt and pepper.  To appease my spouse, I used chili pepper on the other one.

1 TBsp of salt for each piece of meat
1 TBsp of pepper for BOTH pieces of meat
1 tsp of chili powder for one piece of meat

It is important to cut and season the meat and then place it, wrapped in plastic wrap in a vessel of your choosing, for two hours in the refrigerator.  

When you are ready to grill, place it on the counter top (far away from the clutches of your Golden Retriever) for approximately thirty minutes.

3. Eight minutes on each side, please, for medium rare.


   Now this is important, in many regions of Mexico, we use green beans IN our tacos.  I KNOW!  I promise you will love it!  So, do the following:

1. Trim fresh green beans, place in a bowl, toss in 2 teaspoons of olive oil, a dash of salt, and a dash of pepper.  Then place it in a small foil pan.  Place it on the grill for the same time as the flank steak.

2.  Do the same for two yellow onions and one red onion.


Here is something that I call...two ethnicities joining.  I am referring to the tray of beans.  The black beans are for me and the refried beans are for my Caucasian spouse who thinks Mexicans love refried beans.

1. Add one tablespoon of vegetable oil to the tray.  Spread the refried beans on one side.  Add two can of drained and rinsed black beans to the other side.  Place on the grill after you remove the meat and the other two trays.

2. Cut and slice four red and yellow bell peppers.  Add 2 teaspoons of olive oil to a tray and spread the peppers on the tray.  Sprinkle with salt and pepper.

3. Cook these for about fifteen minutes with the lid closed and the heat on high.  

This gives the meat time to rest.  When you remove the green beans and onions, place them in a warm oven.


After everything has been removed and all the trays are placed in a warm oven, it is time for the corn tortillas to be placed on the grill.  The grill should be nice and hot.  You will see the tortillas bubble a bit and then it is time to turn them over.  Leave them on the second side for only a minute.

Then it's time to eat!!!!  Remember to slice the flank steak against the grain.  Now I know I should have a picture here, but...I FORGOT!!  I decided to eat instead.  

Here is what you will need to top them:

1. shredded romaine lettuce
2. crumbled Cotija cheese (No. No you may not use cheddar here.)
3. El Pato brand tomato sauce with jalapeno.

You will love these.  I promise.  Next time I will be better about photographing the end result.  I was just so dang hungry!

Next time...grill foods that are easy!


Monday, July 1, 2013

Cheater Skeeter, Pumpkin Eater (a.k.a. Ice Cream Sandwiches)

I am a cheater...

True. Story.  Here is the proof...
I know!  I know!

But in my defense, I need to find shortcuts where I can because I am allergic to the freaking planet.

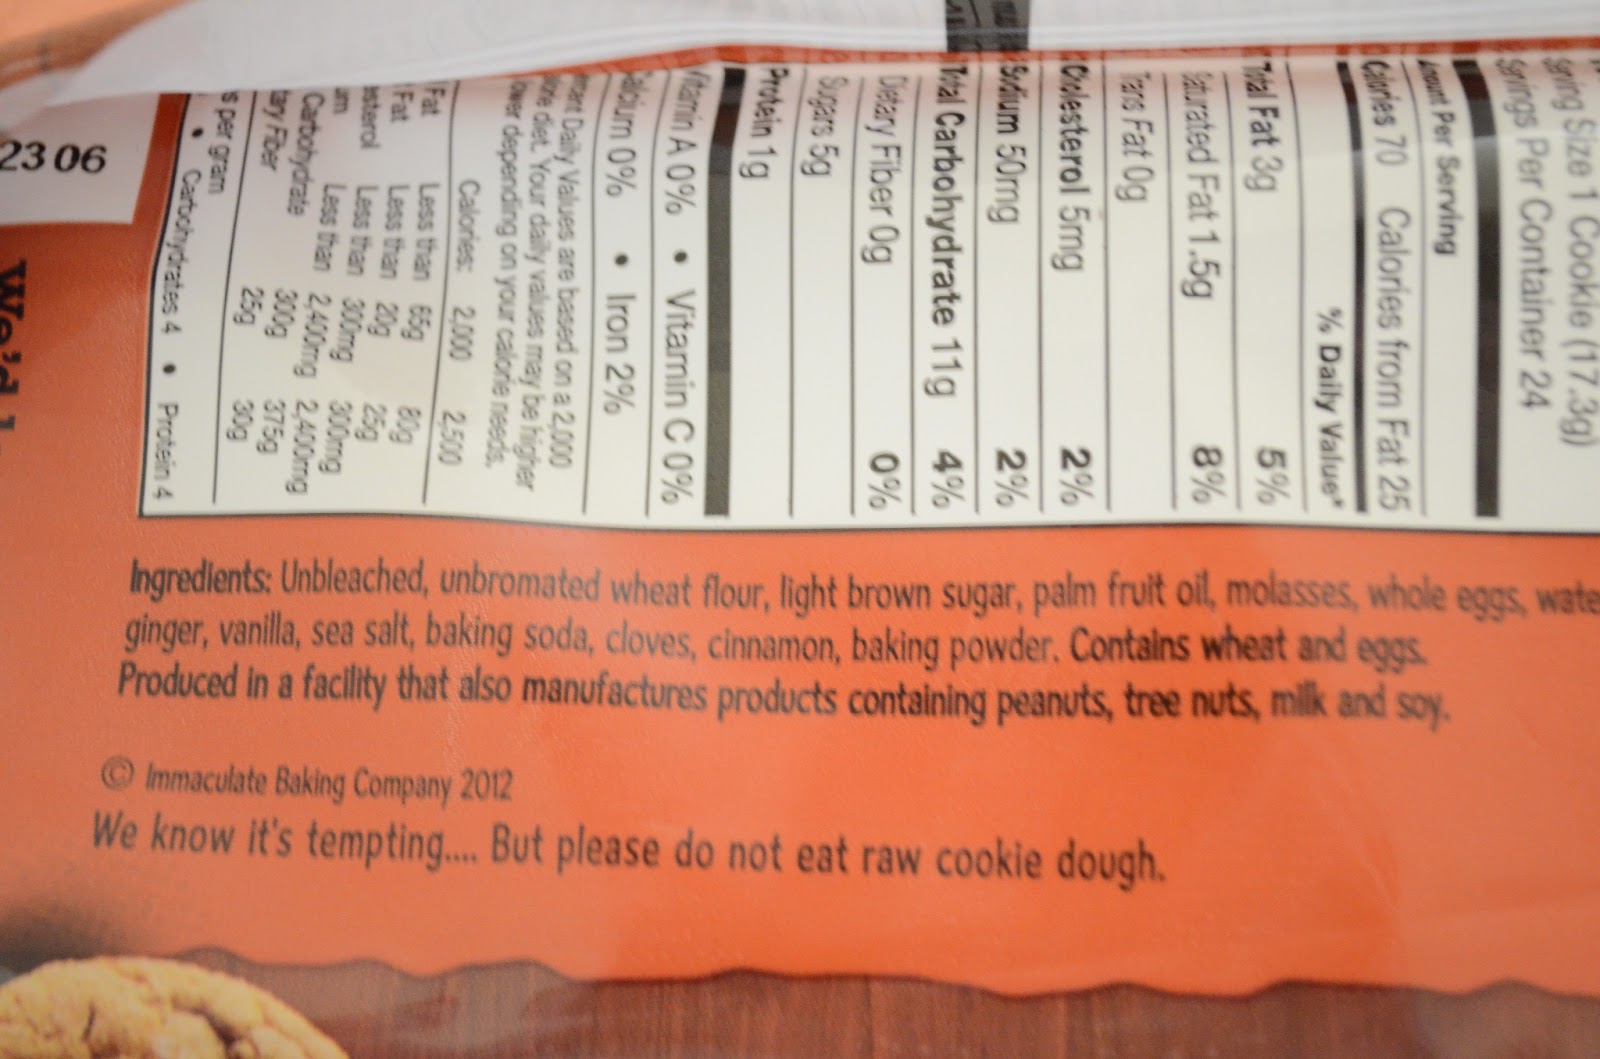
Well, not the WHOLE planet but to so many food ingredients that it is a little ridiculous.  So when I read the back of these ginger spice cookies I could not believe it!


But it's not like it's Christmas, so what could I use them for.  I had a hankering for ice cream sandwiches, but after reading every box in the freezer section it became clear that I would have to make my own from scratch. 

Then I went down the dairy aisle at my local Safeway and saw these lovelies...


I thought I would cry, but I am not much of a crier so I decided that they would make wonderful ice cream sandwiches!  Forget waiting for December to enjoy these little lovelies! So here is what you need to do:

1. Bake the cookies according to package directions.
DO NOT EAT THEM!  WAIT!!

2. Place them on a wire rack to cool and pull out your ice cream for it to become maleable.
This is my ice cream container.  We have to make it from scratch because of my allergies.  We could buy the brand Five from Haagen Dazs, but for the same price we get three times the ice cream by making it ourselves.

3. Turn all of your cookies over and then start scooping your ice cream onto one cookie.  Then gently press a second cookie onto the top of the ice cream.


Lovely...isn't it.

4. Line up the sandwiches in a glass Pyrex dish and work quickly.


5. Cover them with plastic wrap and place into the freezer for at least one hour.  


6. Don't forget to cover your ice cream before you place it back into the freezer.  The plastic wrap has to be directly on the ice cream to avoid freezer burn.


Happy summer!
Next time...FLANK STEAK TACOS

Sunday, April 21, 2013

Flour tortillas and letting go

There is a little known fact in the Watson family and that is that for many years my brothers and I lived with my paternal grandmother.  We called her Buela Gonzalez.  Now this was an event that is still disputed amongst my brothers and I but we all do know this: our parents could not take care of us.

Please do not judge them harshly.  They were not in love and they had four children.  Did I forget to mention that he was only 25 and she was only 23?  Yeah.  They were also dirt poor and had no idea how to care for all of us.  So we were left with an amazing woman who took us in without question and loved us.

Now as much I would love to say I remember everything about her...I cannot.  But one of the things that I do remember is her hands were always covered in flour.  She made THE BEST flour tortillas. We had them smothered in almost anything.

My favorite? It was when I woke up and my flour tortillas were smothered in this...


Don't scoff!  Try it and see what you think.  Of course Buela did not have this type, but I did not care.  It was wonderful.

I also remember how much Buela loved us.  She once took my little brother from our room when he was having nightmares and I sat on the bed crying thinking he was not coming back.  He did come back...out like a light and not crying anymore...and after she laid him down she took me in her arms and held me until I stopped crying.  No one had ever done that before.  I fell asleep.  I slept through the night for the first time.  

When I woke I saw this on the counter top...


The peanut butter was next to the dough on the counter and I knew she was trying to make me feel better.

I watched her roll them out...


Then she placed them on a hot cast iron skillet.  She only used cast iron.  It was everywhere in her kitchen.  I learned quickly that it hurt to drop one of those pans on your foot.  The upside to that was that Buela would hold you until you stopped crying.

I remember how they puffed up...


How she turned them using only her hands because they were so calloused from hard work that she could not feel how hot they were...


I tried that but I do not recommend it.  I used a set of tongs after I attempted this.

I remembered how they sat stacked on a plate waiting for us to devour them...


I remembered how deeply she loved me...even though I was not truly her granddaughter. So I made them. I remembered her and am thankful for my hands being covered in flour...


Recipe:
4 cup all purpose flour
2 tsp of kosher salt
1 tsp of baking powder
2 Tbsp unsalted butter cut up into small cubes
4 Tbsp of shortening cut up into small cubes (you can purchase this in stick form now. My Buela just had a huge tub of it.)
   Add all of the above into a food processor and pulse until small pea size clumps form.  This is about 10 pulses.

1 1/2 cups of warm water
   While pulsing, slowly add the water down the feed tube until a wet mass forms.

Remove this from the food processor and place it on a lightly floured wood board. Knead the dough until it forms a uniform mass and it smooth.  It should only take about three turns on the board. Cover the dough with a slightly damp cloth for 10 minutes.

Roll the dough into a log (do this quickly and DO NOT over handle the dough) and then divide it into 12 equal size pieces.  Gently form them into a round disk.

Cover them again with a damp towel for another 10 minutes.

Roll out three tortillas to an 8 inch diameter using a rolling pin while you heat your skillet on medium high heat. You should make sure your counter or board is well floured. Make sure it is nice and hot.  Once you put the first one in, it should bubble like the picture above and then flip the tortilla.  Cook it for 1 minute on the next side.  Remove it from the skillet and place on a warmed plate.

Repeat these steps with the rest of the dough. 

You can use a non-stick skillet if you want to, but Abuela would never approve. I think they are soft, pliable and wonderful.

Enjoy these and if even for a moment think of my Abuela.


Saturday, April 20, 2013

The First Moment

Anyone remember the moment you decided you wanted to cook?  I was forced into my moment.  This is the truth.  Here is the story...

I was married for less than six months when I was escorted to my husband's family Christmas celebration.  I was nervous, but I decided to muscle through and to try and have fun.  Dinner was wonderful.  I even ate a salad that had fruit in it!  If you ever ate at my house as a kid you know why this was a big deal.  Then it was time to open gifts.  

In the Ayres family people open gifts one at a time and I was slated to go last.  When it came to my turn the family was looking at me with smiles.  Well, everyone but my father-in-law who was grimacing as I began to open the first gift.  I should have known then what I was in for.  The first thing I opened was a Kitchenaid mixer...a VERY LARGE mixer.  Then there was the cooking software...then the set OXO kitchen utensils....a cookbook or four...a food processor...and then it dawned on me that my husband had told his family I did not know how to cook.  I almost started to cry, but instead thanked everyone and I waited until we got home to shed my tears.

My spouse was so apologetic and we had our first marital disagreement.  His mom tried to smooth things over in the days afterward.  She offered to give me cooking lessons.  I took her up on her offer.  I learned to make things that no one will ever make after a ten hour day at work. Duck, anyone?  It had oranges in it.  I was scared of it.

After weeks of learning to cook things I would never cook on my own, she gave me these...


See this one?  It is my favorite.

Want to see how much times have changed? Read this:

I read them as if they were text books.  Now if you know me (which you may not), I LOVE text books.  I still have the first two paragraphs of my eighth grade social studies text book memorized.  Don't you?!

There was advice on everything in these books.  There was even a section on how to measure ingredients.
So now I am a pretty decent cook and am asked frequently how and what to make for different occasions.  This brings us to today and this new venture in the Ayres' household: a food blog.  Our first venture is a recipe I tweaked from a site called Pinterest.  Have you ever heard of this web site?  Look me up!  Follow me! PLEASE!  I am listed as Auntiecheena.

Now onto the recipe!  Today we are making a rotisserie chicken in the crock pot.  Now I tried the recipe the way it was listed and I am sorry to say that it was a mistake.  The ingredient list looked a little odd, but I persevered anyway.  Tell you what...why don't you skip that step and follow my recipe instead? OK? OK!!

Start with four bone in chicken breasts in a large crock pot.  They will be a little cozy.
Now we need a seasoning to go on top.  This is a picture of:
4 crushed garlic cloves
3 Tbsp of Extra Virgin Olive Oil
2 tsp of kosher salt
2 tsp onion powder
1/2 tsp season salt
1 tsp smoked Spanish Paprika
1 tsp crushed black pepper
Mix this all together in a small bowl with a fork or small whisk.
Now spread it all over the chicken.  Scared of raw chicken?  Wear a pair of non-latex gloves.
Cover the crock pot and place it on high for 4 - 5 hours.  Now you may be wondering why the first recipe did not work.  Well, it was because of this:
See this lovely little beauty from Penzeys Spices?  It has a lovely and amazing flavor but in the original recipe there was 2 tablespoons of this stuff and all I could say was, "Yuck!"  Now go to this web site and order all of your spices.  You can thank me later!


This is what you get five hours later...


Look good?  I know!!!

Here are some suggestions of side dishes:
Potatoes Anna I don't use russets in my recipe but if you have them handy you should go for it!  I am picky and use Yukon Gold.
A mixed green salad with citrus dressing and DO NOT skimp on making your own salad dressing.  Break out that blender, sweetheart, and LET HER RIP!!

Let me know how yours turns out.  Also, please feel free to leave any questions or comments below.